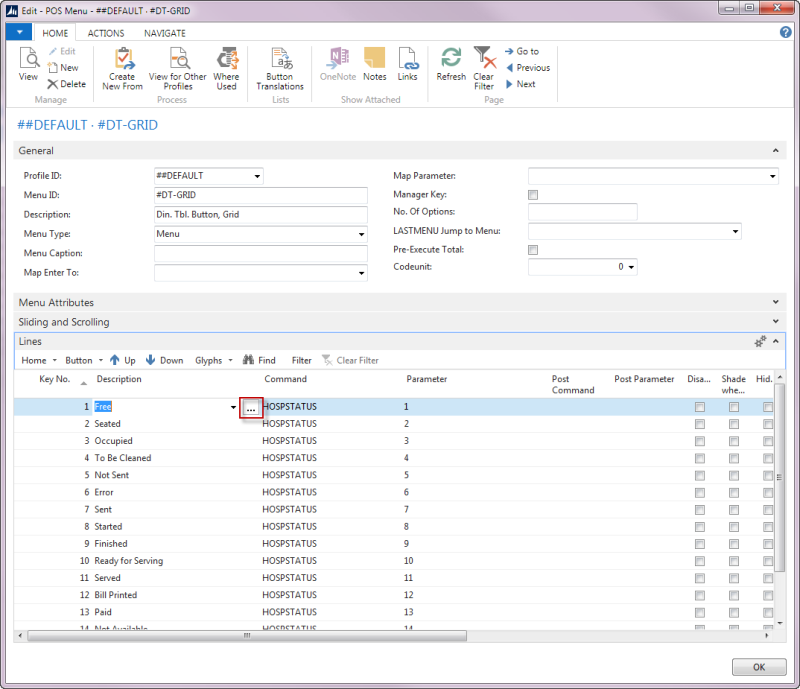
- Go to the Dining Area in question.
- Click the Assist Button next to the Dining Table Button Menu ID field.
- Select to Edit the menu.
-
On a menu line you want to change, click Button, Properties or click the AssistButton in the Description field.
You can adjust the caption alignment and offset and select different skin and font.
Setting Glyphs
On the GlyphsFastTab, there are four glyphs you can edit.
In the Glyph 1 field, you can select the following:
- Text – for symbol (you can use a symbol font)
- Staff – Staff name or staff ID (controlled by Dining Table Staff Descr. Field in the profile)
- Guest – number of guests or seating capacity
- Time – time (controlled by Seating Time Info and Serving Time Info in the profile)
- Amount – Total amount of the order
- Rest. Menu Type – The restaurant menu type of the active KOT
You can adjust the position of Glyph 1, the font and offset.
The text in the Glyph 1 Text field only appears when Glyph 1 is text. The program replaces any text in this field for other options (staff, guest, time, amount and rest. menu type).
The same applies to the other glyphs.
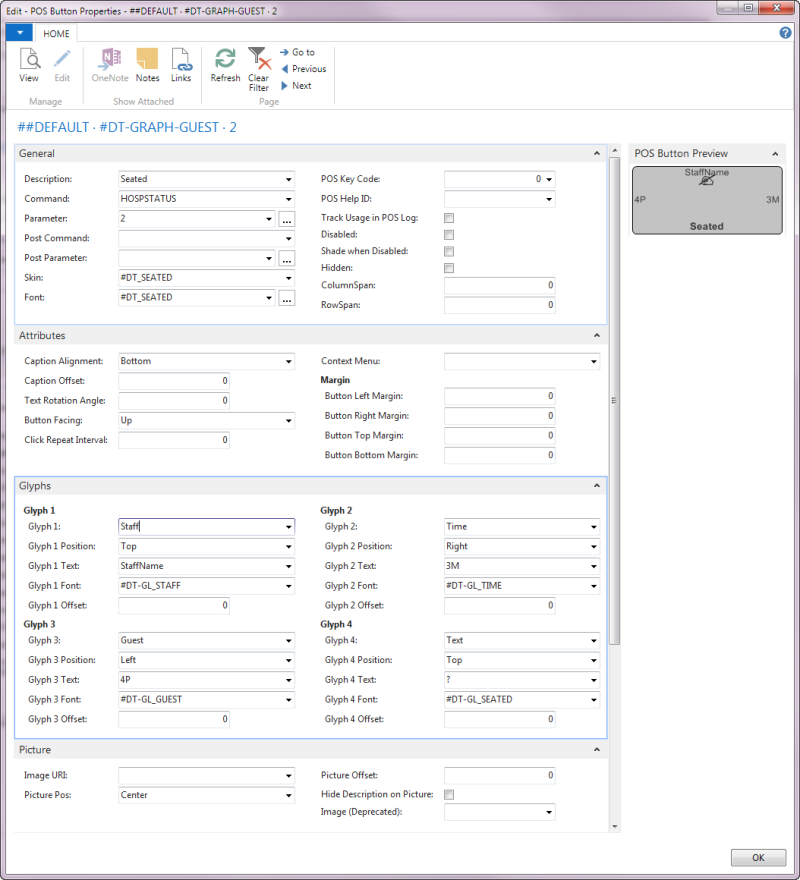
Setting a Picture
You can set a picture on the button.
- Click Lookup in the Image URI field and select an image from the Retail Image List.
- Select a position for the image in the Picture POS field.
- You can set an offset in the Picture Offset field.